Showing posts with label embossing. Show all posts

Sunday, February 16, 2014

Couture Creations 2014 Design Team Audition

Hello, hello!  Today I am sharing several projects I have created using Couture Creations products for their 2014 DT Audition.  For those of you who already follow my blog, you have seen some of these just recently and you already know I love Couture Creations embossing folders, stamps and dies. Their double-sided tape is pretty awesome, too!  

The first two cards I created for CropStop as their January 2014 Guest Designer using Couture Creations 3-in-1 Collection: Butterfly Notes. 


Couture Creations 3 in 1 Collection: Butterfly Notes
Couture Creations All Occasions Collection Embossing Folder: My Gardens
Couture Creations Double-Sided Tape: 18mm x 50m

 You can find a detailed tutorial for my bright "It's Your Day" card here.


Couture Creations 3 in 1 Collection: Butterfly Notes
Couture Creations Double Sided Tape: 18mm x 50 m
Couture Creations Gemstones: Sparkling Champagne

My next card was designed for Core'dinations Cardstock. After embossing the Chocolate Box cardstock with Great Almanzo, I embossed the image with clear embossing powder.  I love how this makes the embossing sheen.   


Couture Creations Great Almanzo Embossing Folder
Couture Creations Dazzling Doily Die

Did you know you can emboss on the back of Sticky Back Canvas?  You sure can! I am not sure I have shared this on my blog before, but it was showcased at CHA 2012. 


Couture Creations Smooch Embossing Folder

I could post a bunch more projects using Couture Creations, but I will end with this card.  It is one of my favorites.  


Couture Creations Peacock Pleasure Embossing Folder

I wish everyone the best of luck! 
~Kate

Wednesday, January 8, 2014

Butterfly Birthday Card

Happy Wednesday!  Today I am sharing a pretty, embossed birthday card created with some great Couture Creations products for Crop Stop. You will find it on their blog today, too.


The Core'dinations cardbase is 4.5" x 6."  I dry embossed the background cardstock with Couture Creations "My Gardens" Embossing Folder.  


Using the background stamp in Couture Creations 3 in 1 "Butterfly Notes"Collection, I created a 3 color image by gently dabbing 3 different colors of ink on the stamp and stamping it onto a piece of smooth white cardstock. 


Check out the side view!  I dry embossed the stamped image with the corresponding embossing folder in the collection.  You can really see how the embossing gives the stamped image great dimension.

Featured CropStop Product


Thanks for stopping by!
~Kate

Wednesday, January 1, 2014

Kicking the New Year off with CropStop!

Happy New Year!  I am so excited to be back with CropStop as their January Guest Designer.  A new year always brings new things, a time of rebirth and growth.  Today I am sharing with you a simple card that embraces this feeling.  


I started with a 4.25" x 5.5" white card base made with Core'dinations Cardstock and embossed the front of the card with Couture Creations Plush Embossing Folder.  These embossing folders are so awesome that even when you dry emboss with them on a white card base the embossed image is so sharp! 


Next, I stamped my sentiments strategically around the embossed image.  To get the two toned image,  I dabbed my sentiment stamp with Momento Ink in Bahama Blue, then I lightly stamped the inked sentiment onto a scrap piece of paper a couple of times (leaving a bit of the blue ink on the stamp) and then dabbed that stamp with some Ranger Archival Ink.  


Couture Creations  Butterfly Notes 3 in 1 Collection was used to make my 3-D butterfly.  This is an awesome limited edition collection that includes matching stamps, dies and embossing folders!  I die-cut two butterflies out of Core'dinations Cardstock using the butterfly die in Butterfly Notes.  Then I stamped one of the butterflies with the butterfly stamp (from this same collection) and the Bahama Blue ink.  I scored the stamped butterfly and then layered it on top of the other die-cut butterfly, making it 3-D.

Wishing you a new year in which you can imagine, dream and fly! 
~Kate

CropStop Supplies: 

Other Supplies:
Unity Stamp Co. 

Wednesday, November 27, 2013

Fast & Fun Christmas Tags

It is almost that time, the time of year I love and believe goes by way too quickly.  Christmas!  I always have grand plans of making lots of wonderful Christmas paper projects and then always decide that I need to slow down and enjoy the season instead of filling it with expectations I know will stress me out.  Believe me, this is every year! 

So instead, I create projects like the fun gift tags I am sharing today. They spruce up a special gift without taking too much time.  Each of these took no more than 10 minutes.  Don't you love projects like that? 


Each of these tags are made with a different Core'dinations tag.  Check out my supply list below for links to each one.  The textured Core Tags are great for embossing and layering!


I love the Smooth Creative Tags for stamping!  You can see how crisp my stamped images are on the tag above and below.


Do you add homemade tags to your holiday gifts?  Leave me a comment here or on my Facebook Fan page by noon EST this Sunday 12/1 and I'll pick a random commenter to win these homemade tags!  

Supplies:

Stampin' Up Stamps
Gel-A-Tins Stamps
Sizzix Dies & Embosssing Folder
EKSucess Border Punch
Ranger Archival Ink & Stickles
Queen & Co Bling

Wednesday, October 30, 2013

Color Me Yellow!

Happy Wednesday! I am just loving bright yellow these days, it just brings a fun and happy feel to any project.  Both of the projects I am sharing today have bright yellow as a focal color.  You'll also find these on the Core'dinanations Blog, too.  


Supply list:
Darice Embossing Folder
We R Memory Keepers Corner Punch
Jillibean Soup Alpha Stickers
Xyron & Helmar Adhesives


Supplies:
12 x 12 Core'dinations Mixed Dots
Score Pal
Studio Calico Papers
Xyron & Helmar Adhesives

Don't forget that Core'dinations Hard Core Crop starts bright and early Friday morning!  I will be posting my challenge that day.  Here is a sneak peak of my challenge...


Pull out your Core'dinations Cardstock and get ready!  Rules can be found here.

Have a great day! 

Wednesday, September 11, 2013

Core'dinations & Lawn Fawn Blog Hop

This week Core'dinations has partnered with Lawn Fawn to bring you some AWE-some projects by both design teams.  I am so excited by this pairing! Today my projects are up on the Core'dinations Blog.  I used Lawn Fawn's "Many Thanks" sentiment stamps and "Quinn's ABCs" to stamp the titlework of my layout on the smooth side of  Core'dinations Cardstock.


To create the fun scalloped bottom, I debossed my Core'dinations Cardstock using a contrasting ink on my embossing folder. So, for the purple cardstock, I used a blue ink and for the blue cardstock, I used a purple ink. Then I punched out lots of circles, cut them in half and alternated the colors in five layers

Layout supplies:
Coredinations Cardstock: Distress Collection
Coredinations Cardstock: Neutrals Collection
Lawn Fawn: Many Thanks
Lawn Fawn: Quinn's ABCs
Sizzix Embossing Folders
Quick Quotes Chalking Ink
Ranger Archival Ink
Want2Scrap Pearls
CM Circle Punch


I used "Many Thanks" for my card sentiment, too. Again, stamping the sentiment on the smooth side of my Snowflake Core'dinations Cardstock.

Card Supplies:
Coredinations Cardstock: Neutrals and Pastels Collections
Coredinations CoreCouture Glitter Cardstock
Lawn Fawn: Many Thanks
CartUs Embossing Folder
Spellbinders Lacey Squares Die
Ranger Archival Ink
Inkessentials Enamel Accents
Kaiser Craft Rhinestones


It was so much fun to pair up Core'dinations Cardstock with Lawn Fawn stamps!  Be sure to visit both the Core'dinations Blog and Lawn Fawn Blog now through Friday for inspiration and prizes.

Have a great day!
~Kate

Monday, September 9, 2013

A Couple of Cards

Hello, Hello!  I have not fallen off the face of the blog planet, I promise.   Our household is adjusting to having a high school freshman who is busy with varsity soccer six days a week and a hubby who is now commuting to the office (he has worked at home for the last four years).  This transition forces my creativity to take a back seat to life.  It also forces my blog to take a back seat to life.  I'm not complaining though, this is an exciting time for my family and I don't want to miss out! I promise I will be posting, just not as frequently in the next couple of months.

Today I have a couple of birthday cards to share with you.  First up is a pretty card that I made for one of my best girlfriends.  She so appreciates a handmade card.  I so appreciate that she saves them all!


Supplies:
Paper & Butterflies ~ Studio Calico
Tags ~ Scarlet Lime
Sentiment ~ Elle's Studio
Adhesives ~ Xyron & Helmar

My second card is one I made for Lily to give to a friend.  I just love the simplicity of this one and the blues with the kraft paper just make me swoon. The feathers and sentiment are heat embossed.  


Supplies:
Paper ~ Core'dinations
Stamps ~ Unity Stamp Co.
Embossing powder ~ Stampendous
Embossing folder ~ CartUs
Versamark ~ Ranger
Adhesives ~ Xyron & Helmar

I hope you have a wonderful day!
~Kate

Thursday, August 29, 2013

August Core'dinations Projects

Yesterday I had several projects go live on the Core'dinations Blog.  I always love to see my projects up there because I love the product so, so much!  Today I figured I would share those projects with all of you!

Two of today's projects are cards in which I used the same stamp set on two different kinds of Core'dinations Cardstock.  On the first card, I stamped on some Pastels Core'dinations.  Love the fun texture you can see through the stamping!


On the next card, I stamped on Glitter Silk...


Card Supplies:
Core'dinations~
Core'dinations Essentials - Darks, Neutrals & Brights
Glitter Silk 6x6
Tillie Dot Assorted Pack 6x6

Other Supplies~
Sizzix & Hero Arts Framelits
Ranger Archival Ink
Dymo
Helmar Adhesives


My last project is a earth-toned layout with lots of Neutrals and Darks to give it a masculine feel. I did some embossing, sewing and sanding on this one!


Layout Supplies:
Core'dinations~
Kraft-Core Shattered Collection
Core Essentials Cardstock - Darks
Core Essentials Cardstock -Neutrals
CoreTags - Darks Assorted Sandable
Sand It Set

Other Supplies~
Couture Creations Embossing Folder
American Crafts Alphas
Quick Quotes Chalking Ink
Helmar Adhesives

Friday, June 28, 2013

June Gel-A-Tins Projects

Happy Friday!  It is a rainy one here in Maine.  I could use a bit of sunshine to brighten my day, but alas, the forecast has those rain clouds looming for at least the next few days.  So I decided to brighten my own day by sharing a couple of projects I shared on the Gel-A-Tins Blog this month.

First up is a set of adorable baby cards using the "Hello" collection.  One for a boy, one for a girl.


Supplies:
Gel-A-Tins Stamps "Hello" Collection
Core'dinations Cardstock
Ranger Archival Ink
May Arts Ribbon
Stampendous & Clear Snap Embossing Powders
Helmar Premium Craft Glue & ZapDots

*************


Next up is an out-of-this-world gift bag, great for any young boy! I  took every stamp in the "Take Me To Your Leader" collection and stamped them across a piece of stamping paper the width of the gift bag.


Supplies:
Gel-A-Tins Stamps "Take Me To Your Leader"
PaperTrey Ink Paper
Ranger Archival Ink
May Arts Ribbon
Helmar Premium Craft Glue & Fabric Glue


I hope these fun, colorful projects brightened up your day just a bit!
~Kate

Thursday, June 6, 2013

Core'dinations, May Arts and Stampendous Blog Hop Day 4


Welcome to Day 4 of the Core'dinations, May Arts and Stampendous Blog Hop! I am Kate from Core'dinations Design Team.  

We are hopping all week long for some AMAZING prizes! Each company is giving way prizes on their own blogs AND there will be surprise winners on the individual team member blogs as well. Make sure you check back every day for more chances to win!

Today I am sharing two projects I made with Core'dinations Cardstock, May Arts and Stampendous products.  My first project is a collection of tags I made to go on the flowers for my daughter and all her dance friends on Dance Recital Day.  


My first step in creating these tags was to sand down Core'dinations Whitewash Cardstock and then print the sentiment on my printer (make sure you take all the powder from dusting off with your Dust Buddy before putting into your printer).  I then stamped the Large Tag Stamp by Stampendous with Versa Mark over the sentiment and embossed it with Stampendous White Pearl Embossing Powder.  You can see it much better in the photo below.


See how the embossing just made the blue color of the Whitewash Cardstock just pop?  I then cut out the tag shape and mounted it on Core'dinations Glitter Cardstock.  The final touch was some pretty white ruffled ribbon by May Arts.  


My second project is a "feel better" card. The sentiment is the Hope Your Better Stamp by Stampendous. I stamped this sentiment on a Core'dinations CoreTag with Versa Mark and then embossed it with the blues in Stampendous Submerge Embossing Powder, creating an ombre effect.  I added a bit of Distress Paint to create the red background on the tag.  

Vivian is up next!  

Here is a complete list of today's hoppers...

Gail Linder
Kate Nolan-Denham <<<<< ME! 

Sunday, May 12, 2013

Mother's Day 2013: Part Two

Happy Mother's Day to all the Moms!  I hope you get a chance to slow down and enjoy family today.  Although, I don't know about you, we are busy, busy, busy. Lacrosse and soccer and grandbabies today.  I wouldn't trade it for the world!  

I am sharing two more Mother's Day cards today. The first one I made for my Mom. She appreciates pretty!  So that is what I gave her.  


I started with Core'dinations Cardstock as the base of my card.  By scoring about 1/8 of an inch in around the front of the card and sanding the score marks, I created a simple frame.  The sentiment is printed on a piece of patterned paper.  Lots and lots of glitter was used to give the flowers some shimmer.  
Supplies:
Prima Flowers
7 Dots Paper and Sticker
Want 2 Scrap Bling
Martha Stewart Glitter (fine and course)

Next up is my Mother-In-Law's card. I went with a vintage flair for my MIL's card. 


This card is one that looks like a lot of work went into it, but really is quite a simple card.  I used the most recent sketch from Freshly Made Sketches.

The 7 Dots printed paper is embossed with Craft Concepts "Christmas Vine" embossing folder for the background.   The embossing really makes it look like I did more work to create this pretty card than I really did! 

I have posted this to CropStop's NSD Embossing Challenge.  If you haven't checked it out yet, you should!  Just create an embossed project and upload to the challenge by May 18th @ midnight. 

Supplies:
PaperTrey Ink Cardstock
7 Dots Paper and Banner

Have a lovely Sunday!  
~Kate

Thursday, February 7, 2013

CHA Projects 1

If you were at CHA in Anaheim last month you might have seen some of my designs.
I was asked to design 8 cards, 1 altered, and 1 layout by CSW Distributors using 
Couture Creations "Fresh & Fun"Embossing Folders*. 

(photo credit Cheryl Boglioli

Today I am sharing some of the cards shown in the display above.  
Each card uses Core'dinations Cardstock in addition to the Couture Creations Embossing Folders.


To create the fun embossing image in "Bursting With Pride" I embossed a piece of Core'dinations Cardstock with Powder Puff embossing folder.  I heat embossed glimmery embossing powder to make it sparkle and then lightly sanded the raised embossed images. 


Debossing was used to create the fun imagery in "A Little Birdie Told Me..." 
 I used the Extra Flint embossing folder with grey Archival Ink to deboss. 
Doesn't this embossing folder  have a bit of retro feel to it?  


I embossed these Maya Road chipboard butterflies with the Almanzo embossing folder.
Once embossed, the butterflies were misted with Tattered Angel's Glimmer Mist and the embossed image was swiped with Momento Ink in a darker shade than the mist.  


Petal Pleasures and Fudge embossing folders were used to simply emboss for "Happy Birthday."
I did sand down the embossed image, just a touch, to have the shades of grey show.  

I hope you enjoyed these embossed creations.
I promise to post some more of them in the next couple of days!


*All of the embossing folders I used in today's post can be pre-ordered at CropStop
CropStop is the only distributor for Couture Creations Embossing Folders in the U.S. 


Wednesday, December 19, 2012

Decked Out Gingerbread House Card

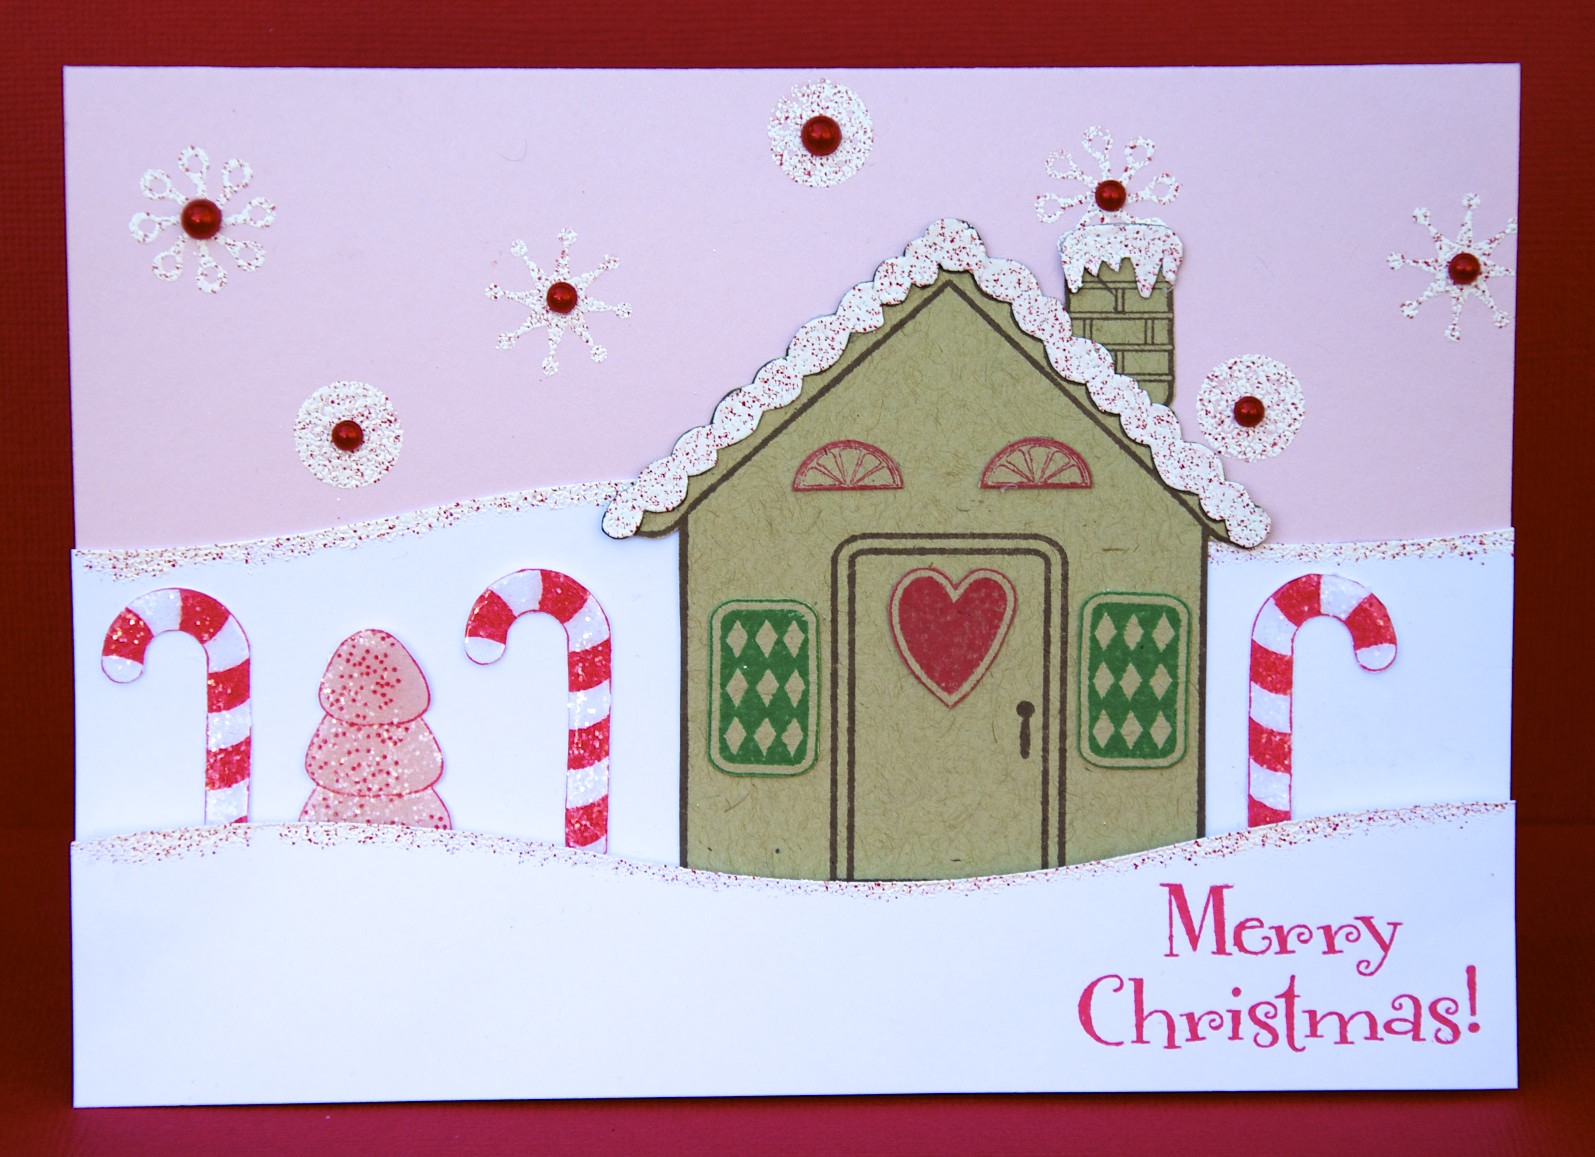
Yesterday was my day to post on the Gel-a-tins Stamp Blog.  I shared one of my favorite holiday cards I have made so far this season. The Gingerbread House Collection is so perfectly festive!   


I heat embossed “Santa’s Candy Cane” Gelly Powder on the top of my snow hills to give them dimension. I stamped and heat embossed the snowflakes. I also stamped the gingerbread house twice so I could fussy cut and layer the snowy roof and chimney. Both were heat embossed with the Gelly Powder.  


For windows and doors I stamped the candy accents, fussy-cut the stamped images and then adhered them to the house.  I embellished the stamped candy canes and gumdrops with Crystal Effects and glitter.  


Gel-å-Tins Supplies:
Gingerbread House Collection
Groovy Santa Collection 
Santa’s Candy Cane Scented Gelly Powder

Other Supplies:
PaperTrey Ink Cardstock
Queen & Co Pearls

I've got another idea brewing for the Gingerbread House Collection and hopefully will have time to create it and share before Christmas is upon us!

(Forgive the change in font/size halfway through the post. Blogger is having some fun with my fonts today!)

Saturday, December 8, 2012

Feminine & Festive!

Quite often I find that my holiday cards are unisex.  Stepping out of my self-induced holiday card mode, I created a festive and feminine card for my first project on the Gel-a-tins Blog.    


I heat embossed the fun candy stamp images (Gingerbread House Collection) that decorate the dressform and the chipboard snowflakes with Gel-a-tin's "Santa Candy Cane" Scented Gelly Powder.  It really does smell like candy canes!  This speckled pink Gelly Powder really pops when you heat emboss it.


The dress and snowflakes are accented with Studded Gelly Gems Roll-Ups. I cut a small strip for the dress belt and cut individual silver studs for the other accents. They were so easy to cut and use! 

Here are some basic instructions on how to create this card:
~ Create a 4"x8" card base.
~ Cut & adhere a 3.75" x 7.75" piece of patterned paper.
~ Spritz dressform w/ mist, allow to dry thoroughly.
~ Stamp images onto dressform with VersaMark, heat emboss with Gelly Powder.
~ Completely cover chipboard with VersaMark, heat emboss with Gelly Powder.
~ Stamp sentiment onto envelope.
~ Adhere doilie to card base,  1/4 from the bottom & right side.  Trim excess doilie on right side.
~ Adhere Gelly Gems as accents on the dress form and chipboard with Helmar Premium Craft Glue.
~ Ahere decorated dressform, stamped envelope and chipboard snowflakes.
~ Share with a friend. 

I hope I have inspired you to create a festive and feminine card today!  

Gel-å-Tins (http://gelatinstamps.com) Supplies:
Gingerbread House Collection
Groovy Santa Collection (sentiment)
Santa’s Candy Cane Scented Gelly Powder
Studded Gelly Gem Roll-ups

Other Supplies:
Bazzill Cardstock
Pink Paislee Paper
Basically Bare Dress Form
Tattered Angels Mist
Memento Ink
Jenny Bowlin Envelope
Helmar Glues 

Sunday, October 14, 2012

Moxie Fab Challenges!

Moxie Fab World has some of the best card challenges on the web, at least in my honest opinion.  I may not always have time to participatein these challenges, but I do check them out each time a new one is posted(which is often).  Today I got a chance to whip out a couple of the Moxie Fab challenges from World Card Making Day.

This is my card for the "Hello/Thinking of You" challenge:


The embossing folder I used on the teal Core'dinations Cardstock is by Darice. 
The fabulous nametag stamp is from Glitz Designs.  I used Ranger Archival 
Ink to stamp the nametag. Flowers are from my stash.  

This is my card for the "Make a Birthday Card" challenge:


"16" is for my niece who turns 16 next week.  
The background was created by stamping the "Shabby Music Background Stamp" by JustRite Stampers with Jet Black Ranger Archival Ink.  I then misted the stamped image with Tattered Angels Glimmer Mist in Carribean Blue.  The heart is punched out of corregated cardboard and embellished with some American Crafts Thickers, red tulle, and older Maya Road pins.  

I was hoping to get a few more Moxie Fab challenge out today, but alas, time got away from me. 
If you have time the challenges are open until tomorrow!  


Thursday, July 26, 2012

Crop Stop Color Challenge!

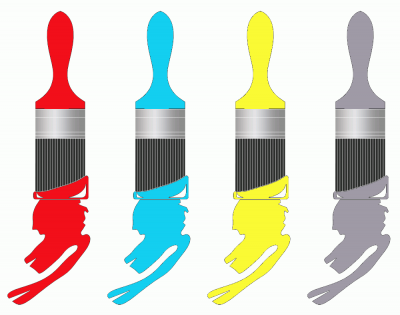
This week at Crop Stop Challenge Blog the challenge is to use 
3 or 4 of the fabulous colors in this photo:


These are some of my favorite colors to use these days!


Card Supplies from Crop Stop

Did you see that Crop Stop is having a Creative Team Call
It is a great team!  Go on...apply today!  

Tuesday, June 19, 2012

Cards Galore

This weekend was a card making weekend. 
I had ones to make for Father's Day.
The one below is the card I made for my hubby, Scott.


He definitely loves his girls bigger than anyone else!
He is a fab Dad, there is no denying. 
His card is based around some fun Tim Holtz ruler paper.  
You can see how I made a card very similar to this one in my 
Simply Colorful Masculine Card Class on Helmar Ustream recorded live tonight.  

I got some more fun Cart-Us Embossing Folders from Crop Stop 
last week and had a grand time using them to make cards.


I kept my cards simple to focus on the fantastic new embossing designs.
Trendy Circles really pops on the sunshine yellow cardstock. 


I embossed and debossed the melon and aqua papers with the 3D Dots embossing folder.
The embossing was lightly sanded to show the core of the cardstock.


Brick Wall is a unique embossing folder.  I embossed some kraft paper
and then inked the embossed image with some brick red ink. 
Love that I found the perfect quote to match the brick.