Showing posts with label Core'dinations. Show all posts

Wednesday, September 24, 2014

Sequins, Stencils and Splatters!

A couple of weeks ago I shared the first card I made using stencils and splatters together. Feeling like I could really design many different cards using the same concept, I made two more birthday cards with sequins and paint splatters.  Sequins were just the perfect touch for finishing off both cards!


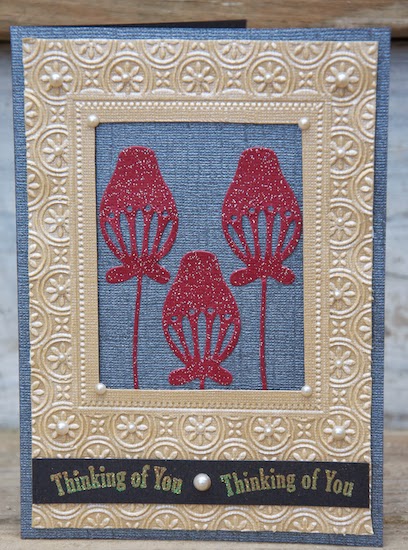
I mixed modeling paste with Distress Paint to create the textured base to use with the stencil in this first card.  This mixture dries quickly. I then splattered Distress Paints by spraying a small amount of the paint off of a paint brush.  Random placement of sequins gave this card just the perfect touch of bling. 

Supplies:
Core'dinations 110lb Smooth Cardstock
The Crafter's Workshop "Specimens" Stencil
Dick Blick Molding Paste
Tim Holtz Distress Paints & Archival Ink by Ranger
PaperTrey Ink Stamp
Misc Sequins

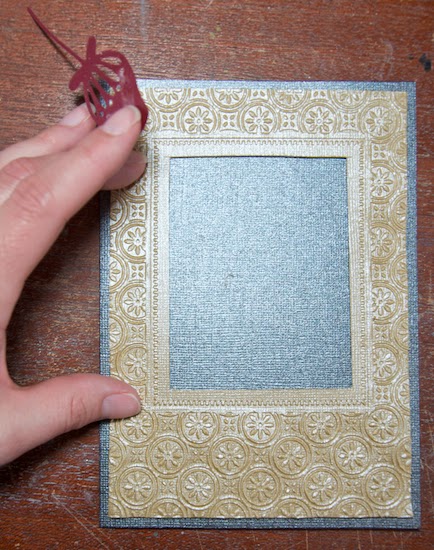
My next card was total trial and error, but oh so fun to make!  I must have thrown away three stenciled pieces before I got the feel I wanted.


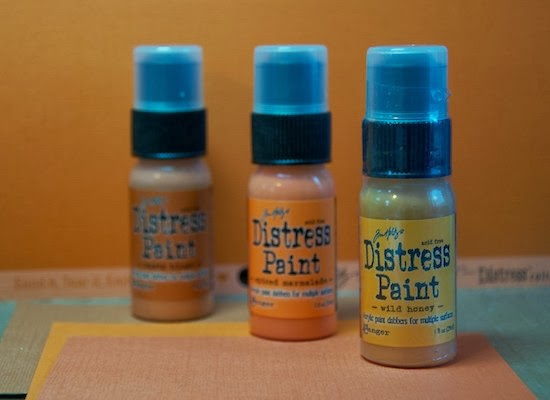
To create the pie chart, I heavily covered a piece of Core'dinations 110lb Smooth Cardstock with two different colored mists.  I then used Inka Gold Metallic Rub with the stencil over the misted cardstock.  This Metallic Rub is the bomb!  Totally dries without rubbing off.  The sentiment is stamped and heat embossed onto a piece of Core'dinations Vellum. Did you know they have vellum now?  

Supplies:
Core'dinations 110lb Smooth Cardstock & Vellum
The Crafter's Workshop Pie Chart Stencil
Tattered Angels Mists
Viva Decor Gold Metallic Rub
PaperTrey Ink Stamps
Ranger Embossing Powder
Misc Sequins

Saturday, August 9, 2014

Beach Mini Canvas

We love the beach and are so spoiled to live only 45 minutes from the ocean.  To me, the ocean is a place of freedom & relaxtion.  The thought of it inspired today's beach-themed mini canvas created with lots of Core'dinations Cardstock. 


To create this 4" x 4" mini-canvas:

1) Cut, sand and dust a 3.75" x 3.75" piece of Spotted Jillian Aquaduct.  Adhere to the canvas with craft paste .  I used Helmar's Decoupage.


2) Ink the edges of the canvas and paper with a color that matches the cardstock background. Let the ink dry thoroughly before moving onto next step.  You could even heat set the ink. 
3) Place another layer of craft paste over the canvas.  Set aside to dry while doing the next step. 


4) Tear, sand and dust three 3.75" wide pieces of Core'dinations Whitewash Cottage Porch.
  •  Layer & glue these pieces onto to the center of the canvas so the tearing is shows on each layer. This creates the beachy waves. 
  • Mix craft glue & chucky clear.  Paint this mixture onto the "waves." 

5) Tear, sand and dust one 3.75" inch piece of Core'dinations Whitewash Grandpa's Trunk.  
  • Heat emboss a bit of gold embossing glitter to this piece. This gives it a textured beach sand look.   
  • Glue the "beach sand" to the bottom of the canvas, overlapping the waves.  


6)  Punch out a starfish from Core'dinations Neutrals: Beach.  Sand & Dust starfish before adding a bit of ink along the edges.  Glue onto the right bottom of the canvas.  

7)  Add another layer of craft paste over whole canvas (sides included).  Let this dry thoroughly. 


8) Freehand paint the quote on the canvas using white craft paint.  Paint over the quote with another layer of white to make the quote really pop.  

***Core Tip: Use Core'dinations Cardstock for any multi-media canvas!  It is the only textured cardstock I have found that will not warp with multiple applications of craft paste, paint, embossing, inks and glues.  

Core'dinations Supplies:

Other Supplies:
Martha Stewart Starfish Punch & Glitter
Helmar Decoupage & Craft Glue
Quick Quote Chalking Ink

Tuesday, August 5, 2014

Core'dinations 2014-2015 Design Team Call!


Core'dinations ColorCore Cardstock is currently having a Design Team Call!  I highly encourage anyone with a love for all things Core'dinations to apply.  It has been one of the best Design Team experiences I have had, honestly couldn't ask for a better company to work with.  You can find  details on the Core'dinations Blog

Monday, August 4, 2014

Friendship Makes Life Colorful

National Friendship Day is the perfect excuse to make a cute card for a friend!  I was able to make this cute friend card in a snap with Core'dinations Cardstock.  


1) The white card base is 4.5" x 6" of Core'dinations Neutral "Snowflake with the top right and bottom left corners rounded. 
2) I embossed the Core'dinations Whitewash background (4.25" x 5.75") with a Couture Creations Embossing Folder.  
3) The embossed piece was then sanded with Core'dinations Sand It Gadget and dusted with the Dust Buddy to let the blue core show through.


4) I printed my sentiment on Core'dinations Smooth Oval Tags.***

***Tip: When using CoreTags in your printer you are best to print the sentiment out on a piece of paper first to make sure that your sentiment will fit on your tag.  I then attach my CoreTag with semi-permanant adhesive over the already printed sentiment and print the sentiment again.  Always perfect placement when done this way! 

5) Colorful ribbon was then added to the printed tag was glued with ZapDots 1/3 up from the bottom of the card. 

6) The colorful die cut buttons are made from scraps of Core'dinations Cardstock.  Once cut, I ran them through my Xyron X Sticker Maker and sanded/dusted them before adding them to the embossed circles.  


7)  Give the card to a friend and you are sure to make him/her smile!  

Core'dinations Supplies:
Misc. Core'dinations scraps

Other Supplies:
Couture Creations Embossing Folder
Papertrey Ink Button Dies
EK Success Corner Rounder
Xyron Sticker Maker
Helmar ZapDots

Thursday, July 17, 2014

Busy As A Beaver Birthday Card

I am sure you are never late sending a birthday card, but I am!  My sister is the lucky recipient of this fun belated birthday card made with Core'dinations Tim Holtz Kraft-Core Nostalgic and Shattered Collections.  


To create this card:
1) Emboss a 4.25"x 5.5" card base made with Core'dinations Kraft-Core Nostalgic No. 15.
2) Sand embossed cardbase with Sand It Gadget and dust with Dust Buddy.
3) Round bottom corners of card base with corner rounder punch.
3) Cut a 4.25" x 1" and 4.25" x 2.5" of Core'dinations Kraft-Core Shattered No. 20s, corner rounding the 1" piece.
4) Using the backside of the 2.5" piece you cut in step 3 (Kraft side), stamp your sentiment on the right lower side of this piece.  
5) Glue down the stamped Kraft piece and the 1" piece (with the Shattered side showing) 1/2 inch from bottom of card).


5) Stamp the critter image two times, once on Core'dinations Kraft-Core Nostalgic No. 23 and once on Kraft-Core Shattered No. 20s. Stamp the tree stump onto the Kraft-Core Nostalgic No. 23. ***

***Tip: Be sure to sand & dust both of these pieces before stamping your image.  By sanding and dusting before stamping, you get a sharper image and keep dust particles off of the stamp.

6) Fussy cut out both images stamped on the Kraft-Core Nostalgic No. 23.
7) Cut out the tail, belly and nose from the critter image stamped on the Shattered No. 20s and layer onto the critter image you cut out in Step 7.
8) Using double-sided foam tape, adhere the tree trunk and critter to the right side of the card, next to the stamped sentiment.
9) Give to someone.  It will certainly make them smile!

Core'dinations Supplies:

Other Supplies:
Darcie's Heart & Home Rubber Stamps
Spellbinders Embossing Folder
Ranger Archival Ink
WRMK Crop-A-Dile

Wednesday, July 16, 2014

Welcome Little Squirt Card

Core'dinations has a sea of colored-core cardstock to create the perfect ocean scene for any card or layout!  Today I am sharing an ocean themed baby card made with Core'dinations Graphic 45 Lights and Tim Holtz & Ranger Adirondack Collection. 


Core'dinations Supplies:

Other Supplies:
Darcie's Haert & Home Rubber STamps
Scor-Pal
Ranger Versa Mark & Archival Ink & Super Fine Embossing Powder


Stamping on Core'dinations Cardstock is so fantastic because you get a sharp image and texture!  


Technique Tip:  When heat embossing with clear embossing powder on Core'dinations Cardstock, be sure to sand and dust the cardstock before stamping the image with Versa Mark.  This allows for the colored core to show through clear embossing.  I did this on the waves and I love that it gives different hues to the waves, just like you would see at the ocean! 

Tuesday, July 15, 2014

Be True, Be You

Core'dinations Cardstock is such a great weight to use with different mediums!  Today I am sharing a tutorial for the simple and pretty multi-media layout I made with lots of Tim Holtz Kraft-Core Nostalgic Collection. 


Core'dinations Supplies:

Other Supplies:
The Crafter's Workshop Mini Cloud & Poppies Stencils
Ranger Tim Holtz Adirondack Snow Cap Mixative
Dick Blick Modeling Paste 


To create this 12x12 layout:
1)  Sand & dust 1/2" border around the 12x12 Kraft-Core No. 15 background.
2)  Cut, sand (especially the edges)& dust:
     a) Two 10" x 2" and one 10" x 1.5" pieces of Kraft Core No. 6.
     b) One 10" x 2" and one 10" x 1.5" pieces of Kraft Core No. 2. 


3) Flip to the backside one of the 10" x 2" pieces of No. 6 cut in Step 2.  Using a cloud stencil, outline the clouds using a score tool.***  Sand and dust the clouds embossed on the front side.

****Tip: When embossing cardstock using a stencil and score tool, use a rubber mat underneath the stencil.  This allows you to get a deep scored image without ripping the cardstock.


4) Using a paint brush, paint in the clouds with a white wet medium.  I used Ranger's Snow Cap Mixative because I liked that looked like different densities in the clouds.


5) To create the "be true" part of the title, use a stencil with acrylic modeling paste to the left side of the 2nd piece of 10" x 2" piece of No. 6.  Apply evenly with a popsicle stick.  When removing stencil, be sure to lift the stencil up straight so you don't smudge the title work. 

6) "To you" is added to the 10" x 1.5" piece of No. 6 after the cardstock has been adhered to the background using the same technique and placement in Step 5. 


7) Alternating the colors, add the cut & embellished pieces of cardstock to the background in a slightly angled manner.

8) Mat three wallet-size photos with Kraft-Core No. 15.  Making sure to sand and dust the edges before adhereing the photos. 


8) Finish off by adding lots of Darice Sequins with a dollop of Liquid Pearl in the middle.  

Multi-media layouts do not need to be complicated.  Just by using a couple of wet mediums to Core'dinations Cardstock, you can create fun titlework and painted embellishments! ~Kate

Friday, July 11, 2014

Camp Games

Today I am sharing my "Camp Games" Layout. It is on Core'dinations Blog today, too!  Core'dinations Tim Holtz & Ranger Distressed Collection was all the cardstock needed to create an earth-toned camp layout!


I used some basic techniques to give this layout dimension and show off the color-core.  The Chipped Sapphire was embossed, sanded and dusted to make the giant blue banner in the background.  

The simple journaling reads "Jeff made some serious ladders for ladder ball @ camp."  


The Vintage Photo Cardstock was crimped, sanded and dusted to make the photo mat.  


I scored, sanded and dusted the two ends of the banner made with the Dried Apricot Cardstock.  This gave it a bit of texture that was needed for a finished look. 

Tip:  When making banners, you do not need to have a die cut. Just gently fold the cardstock in half (do not fold so much that there is a crease) and snip from the end into the center at an angle.  

 Core'dinations Supplies:

Other Supplies:
Scor-Pal
Fiskars Crimper
Spellbinders Embossing Folder
Imaginisce Patterned Paper & Sticker
Alphas: American Crafts & Fancy Pants Designs

Thursday, July 10, 2014

Summer Fun This Way...

Sanding is key when using Core'dinations ColorCore Cardstock! Sanding isn't just about letting the ColorCore show, it is about showing off the ColorCore to add dimension and design.

The obvious areas I sanded with my Sand It Gadget were my embossed yellow flowers and splashes at the top of my layout.


The not-so-obvious areas I sanded were the arrows and waves.  Sanding these elements helped give a 3-D effect without adding height. 


After sanding your Core'dinations ColorCore Cardstock, don't forget to dust with your Dust Buddy!  It really does clean up the dust and keep the colors true.

Core'dinations Supplies:

Other Supplies:
Darice Sequins
Sizzix Dies
Cart-Us Embossing Folder
Elle's Studio Tags
American Crafts Sticker
EK Success & Epiphany Crafts Punches
Jillibean Soup Alphas

Wednesday, June 11, 2014

My Way: Core'dinations & Stampendous Blog Hop


2014_06_coredinations

Core'dinations is celebrating with Stampendous this week!
 
Of course there are prizes this week! Three prize packages will be awarded. The package from Stampendous includes the Lovely Garden Stamp Set; the Matching Lovely Garden Cutting Dies; a Sand It Kit from Core'dinations which includes a sanding block, replacement sandpaper, and a "must-have" Dust Buddy clean up cloth; AND Core'dinations will also be sending the lucky winners some of our fantastic 6" X 6" paper pads. PLUS an extra special bonus - our friends at Dreamweaver Stencil will be adding the gorgeous Stone Wall stencil that Jamie Martin from Stampendous used in her terrific card she'll be posting this week (you can see a peek of it on the blog banner!
We'll draw three random blog posts from all the posts this week. Then we'll choose one comment from each. Of course we'll love you even more if you pin our projects to your Pinterest Boards or if you Tweet, or Share on Facebook, follow us, like our pages.

LET'S GET STARTED!

For my hop project I created a fun 8" x 8" layout using lots of Core'dinations WhiteWash Collection and Stampendous Lovely Garden Cling Stamps and Die Cuts(link is above).


I got a little crazy sanding the Whitewash and stamping flowers!  Love how crisp these stamps are on the textured Core'dinations.  


I hope you enjoyed my project!  The fabulous Debbie Standard is up next. 
~Kate

You know the drill! Here's who is posting today!
PLEASE NOTE: A few DT'ers might be up a bit late due to some technical difficulties so hang with us today, thanks!
Kate Nolan Denham (you are here)

Sunday, June 8, 2014

SHS 2011

Lots of graduations this weekend in Maine, so it is only fitting to share this graduation layout that sports school colors from Core'dinations Vintage Collection.  It is one of my favorite collections!


I did lots and lots of sanding with my Sand It Gadget.  I wanted the color core to really pop on the edges of the mats, along with where I embossed and scored.  It allowed me to add dimension without having to add more layers.


You can see how awesome the Core'dinations Color Core looks in this up close photo!  

Core'dinations Supplies:

Other Supplies:
Fiskars Crimper
Scor-Pal
Spellbinders Nested Pennant Dies
Cuttlebug Embossing Folder
Jenni Bowlin Date Tag
CM Circle System
Stampin Up! Paper Shapers
American Crafts Thickers
Queen & Co. Pearls

Wednesday, May 28, 2014

Seth is ONE!

A happy toddler is one of my most favorite things in the world. They are smiley, they are curious, they are learning and they are always in motion.  My grandson, Seth, is the epitome of a happy toddler and I think the "I am one!" photos in today's layout show just what a happy boy he is.

I wanted to create a very "boy" layout with the photos of my Grandson so I grabbed my stock of Core'dinations Chocolate Box Cardstock.  I embossed, debossed, and die cut my way through the Chocolate Box on this layout!  Each piece of Chocolate Box was sanded to show the great core colors I chose to compliment Seth's plaid shirt.


I used Spellbinder's Sprightly Sprockets Dies to create all the fun gears on this page.   Just loving how once I sanded down gears they looked aged with all that red showing though the Chocolate Box.  I added a bit of Ranger Distress Crackle Paint to them make them pop just a bit more. 


Core'dinations Supplies:

Other Supplies:
Spellbinder's Sprightly Sprockets
Darice Embossing Folder
Couture Creations Embossing Folder
Ranger Distress Crackle Paint
Elle's Studio Tag
Misc Brads

Saturday, May 24, 2014

Party Time with Couture Creations

Happy Saturday!  I created this Sweet 16 card for one of my daughter's friends using Couture Creations Dreamboat 3-in-1: Party Time Set.   My step-by-step instructions for this card can be found on the Couture Creations Blog.  


Please hop on over to the Couture Creations Blog.  Tell them Kate sent you!


Tuesday, May 20, 2014

Thank You, Teacher!

Getting ready for the end of the school year means thanking those who have spent the year inspiring our little ones to learn.  Today I am sharing a gift bag and card made with a variety Core'dinations Cardstock that I hope inspires you to thank a teacher.  


I decorated a simple kraft gift bag from Darice by creating a base designed to look similar to a chalk board.  The same base design was used for the thank you card. 


The giant cardstock pencils on both the bag and card were scored, sanded and bent to give it the 3-D effect of a real pencil.  


Core'dinations Cardstock:

Other Supplies:
Darice Kraft Gift Bag
Score Pal

Sunday, May 18, 2014

Thinking of You

Hello!  I am super excited to share with you that I am a Guest Designer for Couture Creations this month.  This rich, beautiful sympathy card made with lots of Couture Creations and Core'dinations went live on the Couture Creations Blog yesterday.   


Making this card was an easy task using Couture Creations Cabaret Embossing Folder,  Endless Dreams Decorative Die, Pearls and Foam Mounting Tape. 


To create your card:

1) Start with a 5" x 7" black card base.  


2) Emboss a piece of gold cardstock using Couture Creations Cabaret Embossing Folder and then trim embossed image closely. 


3) Before putting away your Big Shot (or other die cutting/embossing machine), die cut three burgundy flowers out of Couture Creations Endless Dreams Die C0723421.


4) Using a craft knife, cut out the non-embossed center of the gold cardstock embossed in Step 2.


5) Flip over embossed cardstock.  Add Mounting Foam Tape to the outside and inside of the frame.  Peel back tape and center on black card base.


6) Glue burgundy flowers at different levels in the center of embossed frame. 


7) Add stamped sentiment 1/2 inch from the bottom of the embossed frame.

8) For a finishing touch, add Couture Creations Pearls to the centers of the embossed circles and in between the stamped sentiments. 

I hope you enjoyed my tutorial today.  I'll be back next week with another one! 

Couture Creations Supplies:
CO723163 Cabaret Embossing Folder, Romantique Collection
C0721985 6mm Foam Mounting Tape
 CO721999 Cafe Creme Pearls
C0723421  Endless Dreams Die 

Wednesday, May 14, 2014

A Little Distressed!

These cards were shared on the Core'dinations Blog back in February.  Not sure how I missed that, but I wanted to be sure all my followers got to see them, too.  Even if it is a little late!

 I am all about the Tim Holtz Distressed Cardstock from Core'dinations.  Did you know this line of cardstock coordinates perfectly with most of the Distress Paints?  It sure does! I started this card by pulling out the colors I wanted to use from the Distress Collection Cut & Emboss Series, Bundled Sage and Chipped Sapphire.  Then I found the matching Distress Paints in my collection and went to work.


I love how the texture of the cardstock shows through even with the Distress Paint!  I loved it so much I made another card using the same technique and a simple tutorial for you.


1) Start with a 4.5" x 6" card base made with Snowflake Core'dinations Cardstock (Neutrals Collection)
2) Cut, sand & dust colored cardstock mats from Distress Collection Cut & Emboss Series:
    a) 5.5" x 4.25" in Rusty Hinge
    b) 5-3/8" x 4-1/8" in Wild Honey
    c) 5.25" x 4" in Spiced Marmalade


3) Cut a 5" x 3.75" piece of Snowflake Core'dinations Cardstock.  This will be your canvas for the matching Distress Paints.


4) Place the cut piece of Snowflake on a Splat Mat with a wave stencil at the bottom.  *I used Cascade Trails by Kiwi Lane.  I also recommend taping the stencil so it doesn't slide (believe me, it will!)


5) Run your Distress Paint along the top of the wave stencil.  *Some hints on this one...test your Distress Paint before you use it on your cut cardstock &  make sure to not use too much paint.
6) Delicately lift the stencil off of your cardstock.            


7) Immediately clean the paint off the front and back of stencil.  The best way I found to do this is just with a dry paper towel.  
8) Reposition the stencil over the last wave you painted.  This allows the waves to line up. 


  9)  Repeat steps 7 and 8.
10)  Allow the paint to completely dry before adding a stamped sentiment in the bottom right hand corner (if you want it like my first card). For my second card I trimmed the painted mat by 1/2" and split the sentiment.
11)  Mat the painted cardstock onto the mats you created in step 2.
12)  Glue the matted cardstock on to the center front of your card base.
13)  Add simple embellishments around the sentiment.
14)  Give to someone to enjoy!

Core'dinations Supplies:

Other Supplies:
Tim Holtz Distress Paints by Ranger
Um Wow Studio Chipboard
Papertrey Ink Stamps & Die
Kelly Purkey Stamp