Showing posts with label helmar. Show all posts

Tuesday, June 11, 2013

Father's Day Altered Frame

With Father's Day right around the corner,  I thought you might want a little inspiration.  Today I am sharing the altered frame I made for my Dad using Quick Quotes Cracklin' Rose Collection


The original frame was a rich cherry wood which I sanded down and added some texture with a texture tool.

Once the frame was sanded and cleaned I generously swiped Midnight Confessions Powder Puff Chalking Ink all over the frame, making sure to get lots of ink in on the edges of the frame.  To add to the distressed look, I swiped off a bit of the ink in some spots with a dry paper towel.  


I glued the Cracklin' Rose paper directly to the mount creating the background for the photo.


The finishing touches included adding the Cracklin' Rose Chipboard Die Cuts to my frame.  I used the corner piece die cuts on the corners of my photo and the sentiment die cut to cover the wording that was etched into the frame.  

Quick Quotes Supplies:

Other Supplies:
Want To Scrap Pearls and Bling Flourishes
Bazzill Flowers
Tattered Angels Mist
Helmar ScrapDots and Premium Craft Glue

Wishing all the fathers out there a very Happy Father's Day! 

Wednesday, June 5, 2013

Reason To Celebrate

A couple of weeks ago was my sweet sister-in-law's birthday.  I made her this special "she-girl" card with lots of love and Helmar Decoupage & Craft Paste


Today is my day to post on the Helmar Blog.  That is where you will find the tutorial for this gem.  I hope you will go visit!


Thursday, May 30, 2013

Beginnings Mini-Album

Happy Thursday!   Many of my regular followers may realize that I am not a big mini-album creator.  I love them and really appreciate the talented women at Quick Quotes who create AMAZING mini-albums, but I struggle with them.  Today I am sharing how easy it is to create with the Quick Quotes Beginnings 6"x8" Wire Bound Book, even for me!

In my previous Quick Quotes video, I shared the Beginnings Wire Bound Book in its entirety. Today I am showcasing completed pages from the Beginnings Wire Bound Book and a video tutorial on how I altered some of the pages in this fantastic album from Quick Quotes.


The cover of this album was simply altered by adding Powder Puff Chalking Ink in Blue Hawaiian and Baja Blue. These colors created a wonderful sky effect! A few pearls were added to middle of the resist flowers that on the cover 


All the pages in the Beginnings Wire Bound Book are 6"x8". I altered my album to have different size pages and created a couple of pockets for journaling tags.  You can see how I did this in my video:


To decorate the album I used several instagram photos of my daughter, Lily, and the May Club Q Page Layout Kit.  This kit came with lots of great papers and embellishments.  Plenty to do this whole album!  The edges of each page are inked with Blue Hawaiian Powder Puff Chalking Ink.


This album is fun and spirited just my Lily!  It really is a reflection of who she is at this moment. I love how easy the Beginnings Wire Bound Album and the May Club Q Page Layout Kit made this project come together! 

Quick Quotes Supplies:
Powder Puff Chalking Ink - Baja Blue, Blue Hawaiian, Coal Miner 

Other Supplies:
American Crafts Thickers
Fab Scraps Black Pearls

Hope you have a lovely day,
Kate

Thursday, May 9, 2013

Mother's Day 2013: Part One

I love making Mother's Day gifts and cards!  Generally, it is the time of year I get all feminine and flowery.  While I did just that for my Mom and Mother-In-Law, I got a little fresh and funky for my daughter, Kass.  I am absolutely sure she does not follow Scissors, Spatulas and Sneakers, so today I am going to share what I made for her.  


I made this fun, colorful altered clipboard (and the card) for Kass in my Helmar Live Ustream Class this past Tuesday.   You can watch the video here....


A close up of my sweet grandsons, Chase and Seth:


Kass' card uses the same fabric & stitching technique as the clipboard.  I just love the fun texture added with the fabric ruffle.  


Clipboard Supplies:
DecoArt Paint
American Crafts Alphas
DMC Thread

Card Supplies:
Core'dinations Cardstock
JilliBean Soup Paper
Unity Stamp Co. 
Ranger Archival Ink
DMC Thread

I hope you are inspired to put a little fresh and funky into your Mother's Day creations!
~Kate

Wednesday, March 13, 2013

Discover True Beauty

This week Helmar has paired up with Pink Paislee to bring you some fantastic projects 
and today is my day to share what I have created on the Helmar Blog.

My first layout is simply layered with wonderful papers from Pink Paislee's "Secret Crush"
Collection.  I used lots of Helmar Premium Craft Glue to adhere these layers. 


I used Quick Quotes Powder Puff Chalking Ink in Dusty Rose to add color to the scalloped ribbon from Pink Paislee and in Coal Miner to add color to "discover" in my title work. 

The banner and arrow are propped up with some Helmar Zapdots.  


In my last Helmar Live Ustream Class I used lots of this same Pink Paislee collection with Pan Pastels to create "My Love."  


Helmar Premium Craft Glue, 450 Quick Dry Adhesive and ZapDots were 
my Helmar glues of choice for this layout.  


Check out my latest Helmar Live Ustream Class below to see what fun techniques I shared! 


Supplies:
Papers & Embellishements ~ Pink Paislee
Chalking Ink ~ Quick Quotes
Pearls ~ FabScraps

Monday, March 11, 2013

So Happy Together Canvas

Good morning!  I am always looking for fun ways to showcase my favorite photos.  There are shelves of framed photos, a wall of layouts, and framed layouts scattered throughout my house. 

 Today I am sharing with you a multi-paneled altered canvas I created using the Quick Quotes March Club Q "So Happy Together" Premier Altered Kit.   I have included a short instructional video showing you how easy it is to put one of these panels together.  


Here is a quick video showing how easy it is to make a canvas panel using this March Club Q Kit. 


Here are some close-up photos of my canvas:


Just to show you how much goodness is packed into the March Club Q's "So Happy Together" Premier Altered Kit, I made a card using my scraps after I was done creating my canvas. The only item on my card not from this kit is the sentiment, which is from the Quick Quotes Inspire Bundle. 


Quick Quotes Supplies:

PowderPuff Chalking Ink in Plum Crazy
Quick Quotes Bundles: Inspire


Other Supplies:


Thank you for joining me today.  I hope you are inspired to create a quick canvas of your own!

Tuesday, March 5, 2013

Multi-media Card for Gel-A-Tins


 The card I am sharing today highlights a multi-media tag utilizing both the "Raindrops Are Falling Collection" and the "Crackle Paint" background stamp from Gel-A-Tins Stamps.


I started with a card sketch from My Sketch World. The tag was created by cutting a piece of patterned paper with a tag die and decoupaging a couple pieces of a coordinating patterned paper randomly on the tag. I spread a thin layer of gesso over a good portion of the tag and then impressed the "Crackled Paint" stamp into the gesso. Doesn't that have such a cool background effect? 

Once the gesso dried, I randomly stamped the umbrellas, from "Raindrops Are Falling," over the tag with matching Quick Quotes Powder Puff Ink and added the sentiment, also from "Raindrops Are Falling," in black Archival Ink.


"Raindrops Are Falling" Collection
"Crackle Paint' Background Stamp
Gelly Gems "Studded" Roll-Ups

Other Supplies:
Bazzill Cardstock
Lily Bee Designs Paper
Quick Quotes PowderPuff Ink
Ranger Archival Ink
EK Success Border Punch
Robin's Nest Dew Drops
Dick Blick Gesso
Misc ribbons & brads

Tags are such a great way to add dimension and multi-media concepts to a card while still keeping it simple and pretty. I hope you are inspired to pull out your stamps to create a fun tag today! 

Sunday, February 10, 2013

Snowy Scrapping

While the snow continued on yesterday, so did my scrapping.
By the end of Nemo we wound up with 30 inches of the fluffy, white stuff.
We never lost power, which made me a happy scrapper. 


"Wear? Eat?" What would you do with your hat? 
Clearly a one year old boy will do both! 
I used a sketch from Scrap Africa as inspiration for this layout.  

Supplies:
Paper ~ Crate Paper, Jillibean Soup
Stickers ~ Crate Paper
Buttons & Washi Tape ~ October Afternoon
Twine ~ The Twinery


The color combo and hearts are inspired by Moxie Fab World's 

I love it when I have a card vision that comes together as sweet on paper as it was in my head
and it is even better when the card whip quick enough for the 10 Minute Craft Dash
....8 minutes.   

Supplies:
Chalking Ink ~ Quick Quotes PowderPuffs
Paper ~ Bazzill


"Snow Angels" is a snow layout for Chase's album.  The pics are from 
the first time Kass took Chase out to play in the snow.  So sweet! 

Supplies:
Cardstock ~ Bazzill
Paper ~ Crate Paper
Alphas  & Flair ~ American Crafts
Tags ~ Little Yellow Bicycle
Rhinestones ~ Queen & Co.

Tuesday, February 5, 2013

A Banner Day!


There are so many banner moments in our lives, aren't there?
It is so awesome when we can capture them on film! 

This layout of Lily riding her 2-wheel bike for the very first time was
posted on the Gel-a-tins Stamps Blog the other day. 
Clearly, this was a banner day for Lily! 


Using Gel-A-Tins Stamps "It's A Banner Day" collection, I created
the two outside tags.   I stamped the banner images on an angle and 
then rotated the tags just a bit to create a swooping banner. 
The banners are colored with Faber-Castell Pitt Pencils.  

Supplies:
Paper ~ Bazzill & October Afternoon
Tags ~ Inkessentials
Alphas  - American Crafts
Ink ~ Ranger Archival
Pencils - Faber-Castell
Glue - Helmar

Monday, January 28, 2013

Auntie

Lily is the best Auntie.  Chase thinks so, too!
It is the funniest thing to see his little body shake with excitement whenever he sees Lily. 
 He has done this since he was old enough to recognize her.

I snapped this photo of Lily and Chase last Easter.
He was just shy of a year old then.   


To create this layout I just pulled out grey and yellow papers to match the photo
and then accented in a bit of teal and green. I wanted the photo to have the spotlight,
so I built simple layers under the photo and added just a bit of embellishments. 


Aren't they just too cute?  

Supplies:
Papers & embellishments ~ October Afternoon
Sparklets ~ Kaisercraft  
Craft Glue ~ Helmar

Sunday, January 20, 2013

Perpetual Memory Calendar

I have seen all kinds of unique ways to document daily memories all over Pinterest.  What I didn't see was one created from items people already had on hand.  This week during my Helmar Live Ustream I shared how I created my perpetual memory calendar with a recycled Maya Road tin, scrap paper, October Afternoon embellishments, ribbon, and lots of Helmar glues. 


Be sure to check out my Helmar Live Ustream if you want to know how to make this! 

Wednesday, January 16, 2013

If You Want the Rainbow...

I shared this framed mini-canvas project on the Gel-a-Tins Blog yesterday 
It was inspired by the girl with her umbrella stamp from Gel-a-tin's 
"Raindrops are Falling"Collection.  Isnt' she sweet?  


What is nice about working with sticky back canvas is that you can 
build a multi-media piece and frame it or put it on a card or both! 
The canvas itself is 4"x4" and fits in this black mini-frame.


Here are the steps for creating my mini-canvas:

1)  I stamped Gel-a-tins "Crackled Paint" Background stamp onto my piece of sticky back canvas with Archival Ink then misted it with Tattered Angels Glimmer Mist

2) The canvas was then trimmed and adhered to the inset for the frame.

3) Some blue and white paint was placed randomly and spread on the canvas.  I used a butter knife to scrape off the paint so all that was left was residual, causing the stamped background to show through.

4) Once the painted dried,  I stamped the girl with her umbrella image onto the right 1/3 of the canvas and I colored in her boots and umbrella with a red Faber Castell Pitt Pen.

5) I also colored the raindrop stamp from Gel-a-Tins "Raindrops Are Falling" Collection with a Pitt Pen to create the raindrops. Then gave them a little sparke by mixing glitter with Helmar Craft & Hobby PVA and painting them on the stamped raindrops.

6) My last touch was handwriting the fabulous quote from Dolly Parton.  It was just perfect for my project!


This now has a new home in my daughter's room.

Have a great day!


Wednesday, December 19, 2012

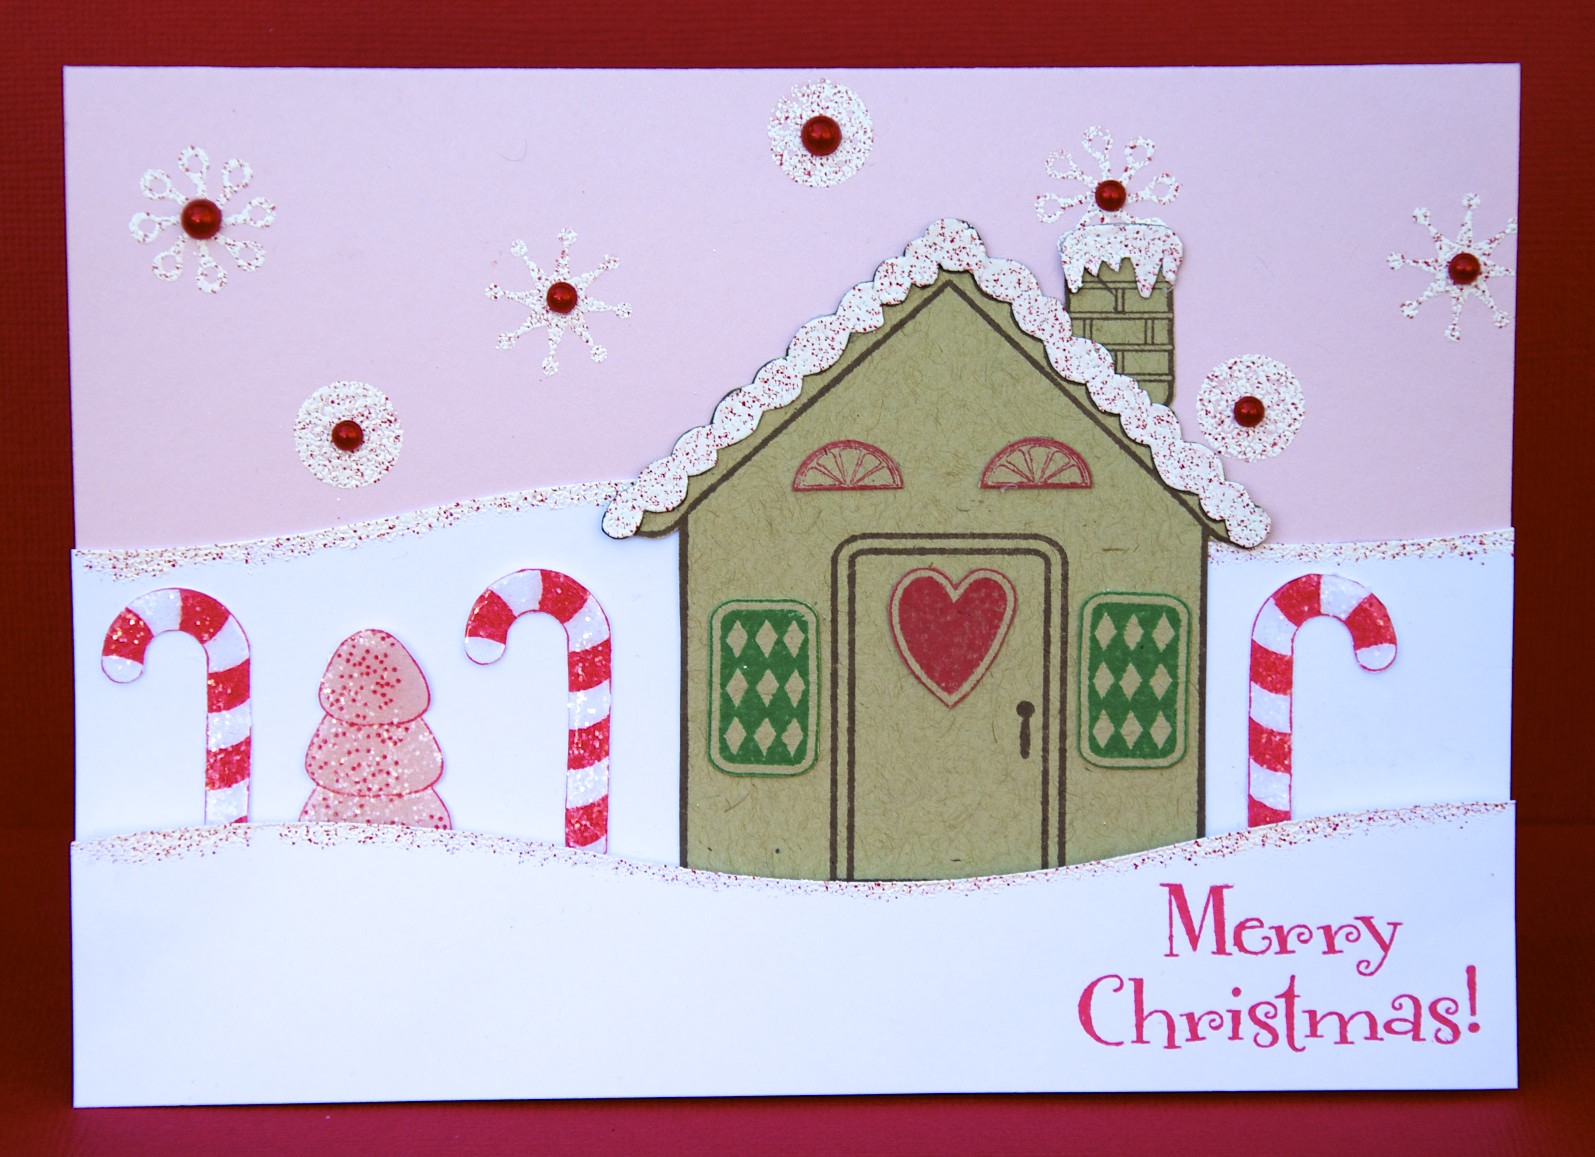
Decked Out Gingerbread House Card

Yesterday was my day to post on the Gel-a-tins Stamp Blog.  I shared one of my favorite holiday cards I have made so far this season. The Gingerbread House Collection is so perfectly festive!   


I heat embossed “Santa’s Candy Cane” Gelly Powder on the top of my snow hills to give them dimension. I stamped and heat embossed the snowflakes. I also stamped the gingerbread house twice so I could fussy cut and layer the snowy roof and chimney. Both were heat embossed with the Gelly Powder.  


For windows and doors I stamped the candy accents, fussy-cut the stamped images and then adhered them to the house.  I embellished the stamped candy canes and gumdrops with Crystal Effects and glitter.  


Gel-å-Tins Supplies:
Gingerbread House Collection
Groovy Santa Collection 
Santa’s Candy Cane Scented Gelly Powder

Other Supplies:
PaperTrey Ink Cardstock
Queen & Co Pearls

I've got another idea brewing for the Gingerbread House Collection and hopefully will have time to create it and share before Christmas is upon us!

(Forgive the change in font/size halfway through the post. Blogger is having some fun with my fonts today!)

Thursday, December 13, 2012

My December Daily

At the beginning of December I decided that I would jump on the December Daily bandwagon.  With no intentions of feeling bad if I didn't get to a day, I set out to create my cover.

(2012 December Daily Cover)

I started the cover of my December Daily album by cutting out a 4"x 6"piece of cardboard box.  I pulled off the top layers to show the corrugated part and then inked it with Vintage Photo Distress Ink.   The cover is then decorated with Authenique's "Festive."   Deciding that 4" x 6" wasn't going to be big enough, I attached the decorated cardboard to a 5" x 7" piece of cream colored cardstock and rounded the outside edges.

(2012 December Daily - Days 1 through 4)

As I got into making my pages each day, I just did want came to me.  Not all my pages will be the same size or match side-by-side. Some days will reflect what we did that day or a holiday tradition or just something random and fun.  Some days will have pictures, some days won't.  Some of the pictures will be fantastic and some will be fuzzy because they are from my phone.  What I will do on every page of my 2012 December Daily is hand journal a note.

Supplies:
Cardstock ~ Papertrey Ink
Patterened Paper, Stickers, Tags ~ Authentique Paper
Glue ~ Helmar Quick Dry Adhesive

Are you doing a December Daily project?  If you are, I would love to see it!  Please be sure to share a link in the comments.

Wednesday, December 12, 2012

Fancy Frame!

Today was my turn to post on the Helmar Design Team Blog and I wanted to share my project here today, too!   

This frame was inspired by a gorgeous, overpriced frame my friend Kelly saw at a shop in Austin, TX.


Knowing we could create our own fancy frames we gathered all of our adornments, supplies, and our friend Pam on a lovely Saturday afternoon.  With a table full of pretties (mostly from Kelly's collection) and lots of Helmar glue we spent the afternoon getting messy.  

(Kelly)

Honestly, I think all three of us started with something in mind and wound up redoing our frame at some point during the process.  For me, I swiped off my first layer of gesso & paint because it was just a tad to thick for my taste.  

(a bit too much!)

( just right!)

We all used Helmar 450 Quick Dry Ahesive and ScrapDots to attach our pretty adornments. 


What I love about these frames is that we all created something totally unique from the same inspiration piece!

(Pam, Kelly, Kate)

You can find Kelly's post about this crafty day on her blog, Babiole de Windsor