
I am all about the Tim Holtz Distressed Cardstock from Core'dinations. Did you know this line of cardstock coordinates perfectly with most of the Distress Paints? It sure does! I started this card by pulling out the colors I wanted to use from the Distress Collection Cut & Emboss Series, Bundled Sage and Chipped Sapphire. Then I found the matching Distress Paints in my collection and went to work.

I love how the texture of the cardstock shows through even with the Distress Paint! I loved it so much I made another card using the same technique and a simple tutorial for you.

1) Start with a 4.5" x 6" card base made with Snowflake Core'dinations Cardstock (Neutrals Collection)
2) Cut, sand & dust colored cardstock mats from Distress Collection Cut & Emboss Series:
a) 5.5" x 4.25" in Rusty Hinge
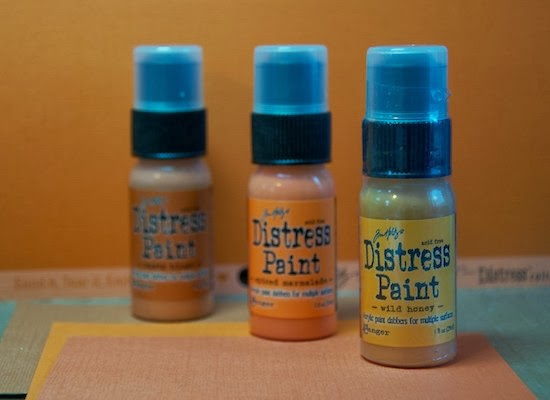
b) 5-3/8" x 4-1/8" in Wild Honey
c) 5.25" x 4" in Spiced Marmalade
3) Cut a 5" x 3.75" piece of Snowflake Core'dinations Cardstock. This will be your canvas for the matching Distress Paints.

4) Place the cut piece of Snowflake on a Splat Mat with a wave stencil at the bottom. *I used Cascade Trails by Kiwi Lane. I also recommend taping the stencil so it doesn't slide (believe me, it will!)

5) Run your Distress Paint along the top of the wave stencil. *Some hints on this one...test your Distress Paint before you use it on your cut cardstock & make sure to not use too much paint.
6) Delicately lift the stencil off of your cardstock.

7) Immediately clean the paint off the front and back of stencil. The best way I found to do this is just with a dry paper towel.
8) Reposition the stencil over the last wave you painted. This allows the waves to line up.

9) Repeat steps 7 and 8.
10) Allow the paint to completely dry before adding a stamped sentiment in the bottom right hand corner (if you want it like my first card). For my second card I trimmed the painted mat by 1/2" and split the sentiment.
11) Mat the painted cardstock onto the mats you created in step 2.
12) Glue the matted cardstock on to the center front of your card base.
13) Add simple embellishments around the sentiment.
14) Give to someone to enjoy!
Core'dinations Supplies:
Other Supplies:
Tim Holtz Distress Paints by Ranger
Um Wow Studio Chipboard
Papertrey Ink Stamps & Die
Kelly Purkey Stamp
Papertrey Ink Stamps & Die
Kelly Purkey Stamp
1 comment:
just beautiful!
Post a Comment